Cargo Bay Structure: Difference between revisions
From Hidden Empire Wiki
| [checked revision] | [checked revision] |
DreamwaverSB (talk | contribs) Die Seite wurde neu angelegt: „{|class="wikitable" |colspan="2" style="text-align:center; font-weight:bold; background-color:#FF6666;"|Laderaumstruktur |- |style="text-align:center;"|Datei…“ |
DerSaveBob (talk | contribs) No edit summary |
||
| (6 intermediate revisions by 2 users not shown) | |||
| Line 1: | Line 1: | ||
{|class="wikitable" | {|class="wikitable" | ||
|colspan="2" style="text-align:center; font-weight:bold; background-color:#FF6666;"| | |colspan="2" style="text-align:center; font-weight:bold; background-color:#FF6666;"|Cargo Bay Structure | ||
|- | |- | ||
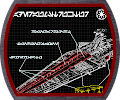
|style="text-align:center;"|[[ | |style="text-align:center;"|[[File: 0 1 106.png]] | ||
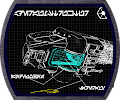
|style="text-align:center;"|[[ | |style="text-align:center;"|[[File: 1 1 106.png]] | ||
|- | |- | ||
|style="text-align:center;"|[[Image: Icons faction | |style="text-align:center;"|[[Image: Icons faction rep.svg]] Republic | ||
|style="text-align:center;"|[[Image: Icons faction | |style="text-align:center;"|[[Image: Icons faction kus.svg]] CIS | ||
|- | |- | ||
!colspan="2" style="background-color:#340096;"| | !colspan="2" style="background-color:#340096;"|Prerequisites | ||
|- | |- | ||
|[[ | |[[Residential Area]] (Level 5) | ||
|[[ | |[[Residential Area]] (Level 5) | ||
|- | |- | ||
|[[ | |[[Shipyards|Shipyard A]] (Level 3) | ||
|[[ | |[[Shipyards|Shipyard]] (Level 3) | ||
|- | |- | ||
|[[ | |[[Research Laboratory]] (Level 5) | ||
|[[ | |[[Research Laboratory|Technology Centre]] (Level 5) | ||
|- | |- | ||
!colspan="2" style="background-color:#340096;"|Max. research level | |||
!colspan="2" style="background-color:#340096;"|Max. | |||
|- | |- | ||
|style="text-align:center;"|50 | |style="text-align:center;"|50 | ||
|style="text-align:center;"|50 | |style="text-align:center;"|50 | ||
|- | |- | ||
!colspan="2" style="background-color:#340096;"| | !colspan="2" style="background-color:#340096;"|Point distribution | ||
|- | |- | ||
| | |Economy points: | ||
|style="text-align:center;"|70 % | |style="text-align:center;"|70 % | ||
|- | |- | ||
| | |Military points: | ||
|style="text-align:center;"|0 % | |style="text-align:center;"|0 % | ||
|- | |- | ||
| | |Technology points: | ||
|style="text-align:center;"|30 % | |style="text-align:center;"|30 % | ||
|- | |- | ||
| Line 41: | Line 38: | ||
<br> | <br> | ||
<br> | <br> | ||
<center><span style="color: blue; font-size: 14pt">“Put Captain Solo in the Cargo Hold.”<br> | |||
Boba Fett, Episode V</span></center><br> | |||
By better structuring the cargo bays of ships, more resources can now be transported and units can be conveyed. Through further research in this technology, we can effectively use and slightly expand the cargo hold, as well as save on packaging, thereby steadily providing more space in all transports! | |||
[[de:Laderaumstruktur]] | |||
Latest revision as of 08:26, 21 May 2025
| Cargo Bay Structure | |

|

|
| Prerequisites | |
|---|---|
| Residential Area (Level 5) | Residential Area (Level 5) |
| Shipyard A (Level 3) | Shipyard (Level 3) |
| Research Laboratory (Level 5) | Technology Centre (Level 5) |
| Max. research level | |
| 50 | 50 |
| Point distribution | |
| Economy points: | 70 % |
| Military points: | 0 % |
| Technology points: | 30 % |
Boba Fett, Episode V
By better structuring the cargo bays of ships, more resources can now be transported and units can be conveyed. Through further research in this technology, we can effectively use and slightly expand the cargo hold, as well as save on packaging, thereby steadily providing more space in all transports!